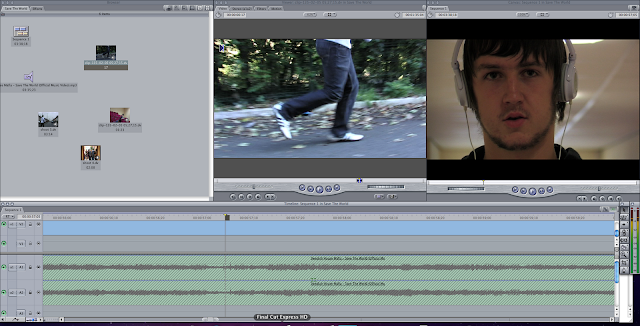
This is the typical interface used when editing the clips recorded, with a specific set-up being used throughout to allow smooth and efficient editing, and enable quick development of skills in Final Cut. The typical setup (as shown in the image) goes as follows:
- All recording 'sessions' to be separate and readily available in the top-left of Final Cut, allowing quick access to cut and edit as needed (using the middle screen).
- Middle screen to allow playback of fully recorded clip sessions and break it down into clips as needed, using the 'in and out' tool.
- The right screen showing a preview of how the actual 'final' product looks.
- The track timeline remains at the bottom, with the music track remaining locked throughout (apart from introduction) to prevent accidental change. Video track(s) to be above with the ability to freely move and edit.
Main Tools Used while Editing
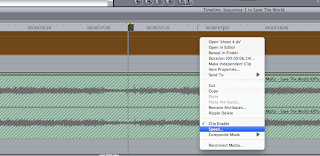
Speed/Slow-Motion

'In and Out' Tool

The 'in and out' feature of Final Cut is a vital part of our editing, allowing the clips recorded in a constant flow to be broken up into desired clips and editing freely on the timeline.

The Razor Blade tool was used to quickly cut clips on the timeline, allowing the moving of clips or removal completely when needed.
No comments:
Post a Comment